Using the Validated Pattern Operator
Background
The Validated Pattern Operator was developed in order to take advantage of the automation provided with the validated pattern framework. It allows users to deploy validated patterns using the Red Hat OpenShift console. The idea is to point it at a validated pattern repo and let the operator do the work of deploying OpenShift Gitops and then all the parts and applications required for the pattern.
Installing the operator
In the OpenShift console select Operators on the menu on the left of the console. Then select OperatorHub.
In the Filter by keyword box type the word validated. The validated patterns operator will appear. Select it. At this time it is a community operator and is not officially supported. A Community Operator information pop-up appears. Click Continue.

On the following pop-up page select the Install button.

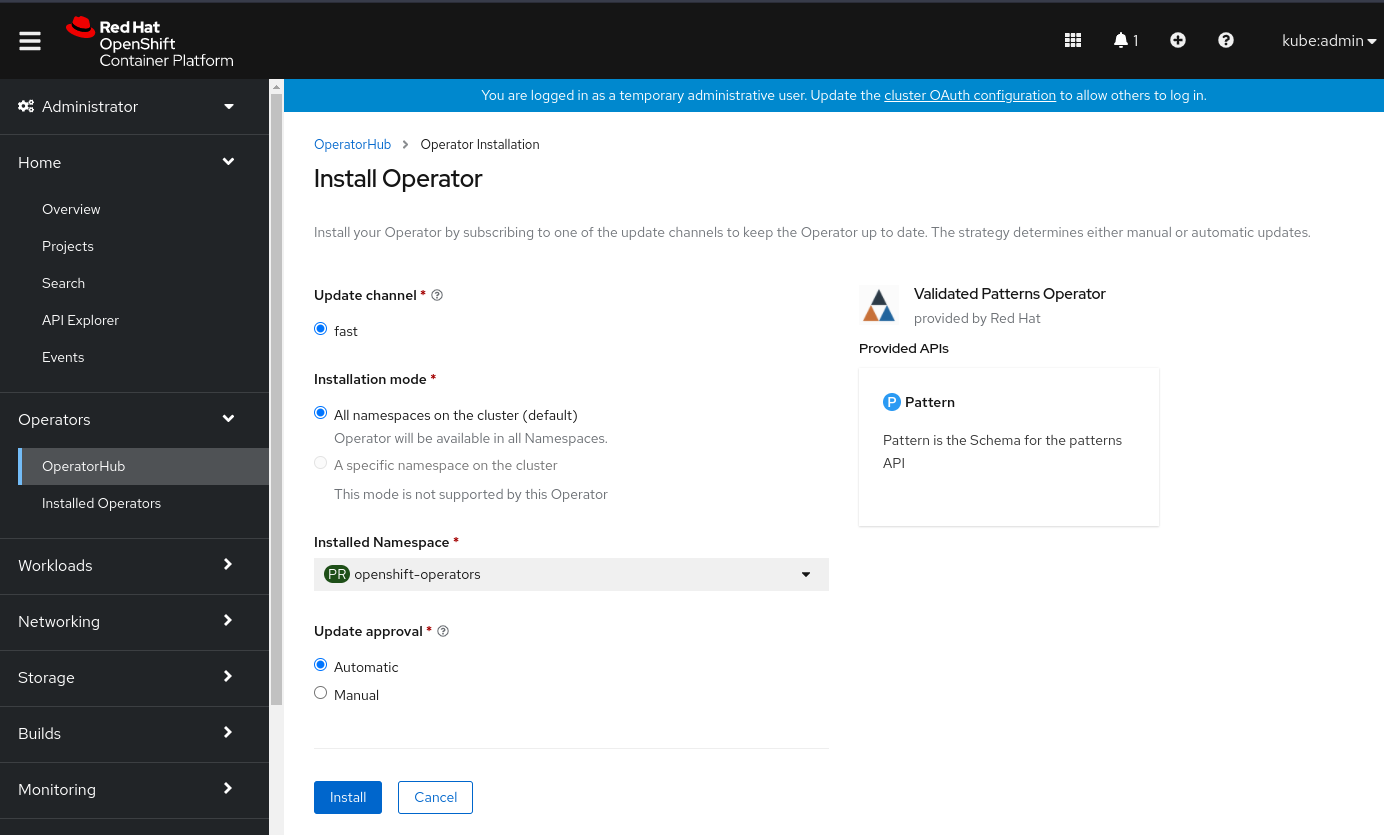
On the Install Operator page leave the defaults and select install.
 )
)
Create a pattern instance
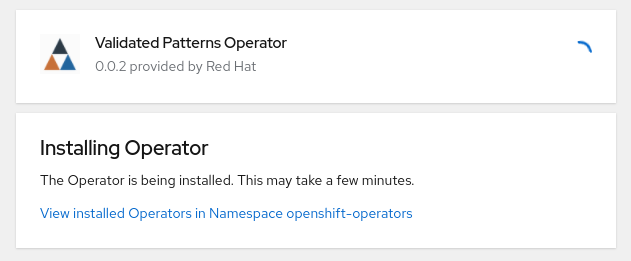
When the operator has completed installation click on View Operator. Then select the Create instance link and start filling out the Create a Pattern form.
- Choose a name for the pattern deployment. This name will be used in the projects created.
- Apply any other labels you may need to this deployment.
- Choose a cluster group name. This is important because it identifies the type of cluster that this pattern will be deployed on. For example if this is
Industrial Edgethen it should bedatacenter. If it’smulticloud-gitopsthen it should behub. Please check with the validated pattern to figure out which cluster group is right for this pattern. - Select the
Git Specdrop down on the form and change theTarget RepoURL to your forked repository URL. E.g. Fromhttps://github.com/hybrid-cloud-patterns/pattern-nametohttps://github.com/my-git-user/pattern-name - You may need to change the
Target Revisionsometimes it’s markedstableor has a specific a version number e.g.v2.1, it may simply bemain, or it might be a new branch you’ve created,my-branch. - Make sure to make any necessary changes to your
values-*.yamlfiles locally and push them to your forked repo. on the correct branch/target chosen above. For a quick start you shouldn’t need to make changes.
Review the rest of the form fields and check if they require changes. For first time pattern deployments you probably don’t need any further changes. Select Create and the bottom of the form. The OpenShift GitOps operator should show up in Installed Operators momentarily.
From there OpenShift GitOps will install the rest of the assets and artifacts for this pattern. Make sure to change your project to All Projects so you will see the other operators installing. E.g. Advanced Cluster Management (ACM).
Please follow any other post-install instructions for the pattern on that pattern’s Getting started page.
